
×
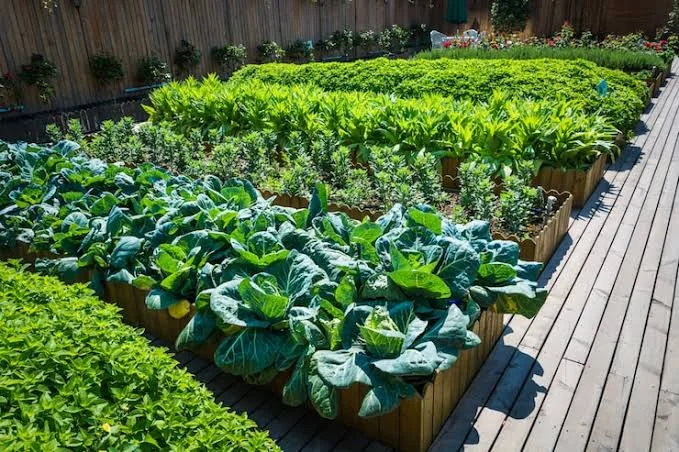
Most beginner garden layouts fail for one simple reason: people plant what they want to eat without thinking about how those plants will grow next to each other. A tall row of tomatoes ends up shading the lettuce. The zucchini vines swallow the peppers. By July, the bed is a tangled mess, and you cannot reach anything without stepping on something else.
A good layout prevents those problems before they happen. This guide walks through the decisions that matter, in the order you should make vegetable garden layout for beginners.
Before you draw a single square on paper, watch your yard for a day. Note where the sun hits at 9 a.m., at noon, and at 3 p.m. Vegetables that produce fruit—tomatoes, peppers, squash, cucumbers—need at least six hours of direct sun, preferably eight . Leafy crops like lettuce and spinach will tolerate less, but they still grow faster and taste better with more light.
The sunniest spot in your yard is where your main beds belong. If that spot happens to be near a wall or fence facing south, even better. Those surfaces hold heat and release it at night, which helps warm-season crops in cooler climates .
Do not put your garden under a tree just because the ground looks bare there. Tree roots spread far and compete aggressively for water and nutrients. The shade also shifts through the season in ways that are hard to predict when you are standing there in April.
Read Also: How To Plan A Vegetable Garden Layout
The most common beginner mistake is going too big. A 20-by-30-foot plot sounds exciting in March. By June, when weeds are growing faster than your vegetables and watering takes an hour every evening, it becomes a chore you start avoiding.
A bed that is 4 feet wide and 8 feet long is a reasonable starting point . That is 32 square feet, enough for a few tomato plants, a row of beans, some herbs, and a patch of greens. You can reach the center of a 4-foot bed from either side without stepping into it, which keeps your soil from getting compacted.
If you want more space later, add another bed next season. Expanding is easy. Shrinking a garden you have already planted and watered is demoralizing.
In-ground rows work. Raised beds work better for most beginners, for two reasons. First, you control the soil. You fill the bed with a mix of topsoil and compost instead of hoping your native dirt is decent. Second, raised beds warm up faster in spring, which means you can plant earlier .
Build beds no wider than 4 feet. Length is flexible. Six to eight feet fits most backyards without dominating the space.
Leave paths between beds that are at least 2 feet wide . You will drag a hose through those paths. You will carry a bucket of compost. You will kneel there to weed. Narrow paths feel efficient on paper and become miserable in practice.
For path material, cardboard covered with wood chips is cheap and works well. Grass paths are fine if you mow them regularly. Gravel over landscape fabric is more permanent but costs more upfront.
This rule solves more layout problems than any other single decision. Put the tallest crops—corn, trellised tomatoes, pole beans, sunflowers—on the northern edge of your garden. Shorter crops go on the south side .
The reason is straightforward. The sun travels across the southern sky in the northern hemisphere. A tall plant on the south side casts a shadow northward, over everything behind it. A tall plant on the north side casts its shadow away from the garden.
If you are planting in a bed that runs east-to-west, the north edge is the back. If your bed runs north-to-south, the tall plants go on one end, and you accept that the far end will be shadier.
Vining crops like melons and winter squash are a special case. They do not just grow tall; they spread sideways. Put them at the edge of a bed where they can spill into a path or onto grass . Trying to keep a squash vine contained inside a bed is a losing battle.
A tomato plant in July wants a deep soaking every few days. A patch of cilantro bolts and dies if you water it that heavily. Putting them in the same bed means one of them suffers.
Think about water in zones. Thirsty crops—celery, cucumbers, lettuce, radishes—go together. Drought-tolerant crops—beans, rosemary, thyme, established peppers—go in a separate area. This lets you water one bed heavily and skip the other without guilt .
The same logic applies to drainage. Low spots in your garden stay wet longer. Put moisture-loving crops there. High spots dry out first, which suits plants that rot easily in soggy soil.
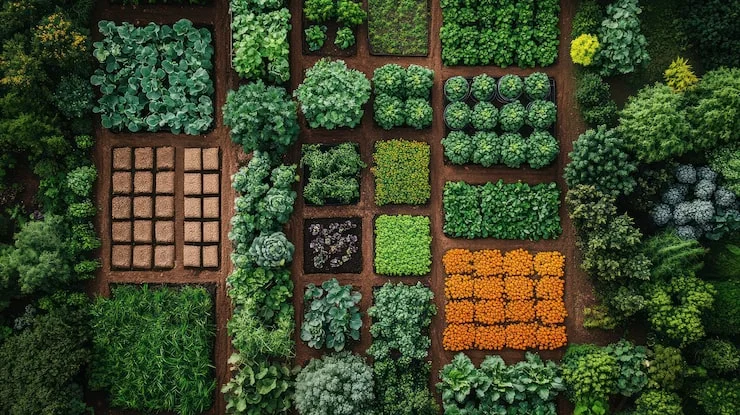
New gardeners look at a six-inch tomato seedling and a two-foot gap on the label and think the spacing recommendation is absurd. It looks like wasted space. So they plant closer, reasoning that they can harvest the extra plants early.
This almost always backfires. Tomatoes planted too close develop leaf diseases because air cannot move between them. Squash planted too close compete for nutrients and produce smaller fruit. The crowded plants never reach their potential, and the gardener ends up with less food, not more.
Follow the spacing on the seed packet or plant tag. If you want to fill the gaps while plants are small, tuck in quick crops like radishes or green onions between them. Those will be harvested and gone by the time the main crop needs the vegetable garden layout for beginners.
You May Also Like: Best Vegetable Garden Layout Ideas for Maximum Yield in 2025
Herbs, salad greens, cherry tomatoes, and anything else you pick daily or every few days should live near your kitchen door or the entrance to your garden. This is not laziness. It is practical design.
When the herbs are twenty steps away, you skip them and use dried. When they are five steps away, you snip a handful while dinner is on the stove. The same goes for pest patrol: plants you walk past every day get checked for problems, and small issues get caught before they become infestations .
Here is one arrangement for a 4-by-8-foot raised bed, oriented with the long side running east-to-west:
The north edge (the back) gets three tomato plants spaced 24 inches apart, with a trellis behind them. In front of the tomatoes, a row of bush beans. In front of the beans, a block of lettuce or spinach. Along the south edge (the front), a border of radishes or carrots. Tuck basil between the tomatoes and beans.
This gives you tall plants at the back, short plants at the front, thirsty greens together, and easy access to the daily-harvest crops at the edge.
Lay your plants out in their pots, still in the flat or tray, on top of the bed. Move them around. Step back and look. Check that tall things are where you want them and that you can reach everything without stretching over a spiky cucumber vine.
Only after the arrangement looks right in pots should you dig holes . This costs you ten minutes and saves you from transplanting a tomato that you immediately realize is in the wrong place.
Water the entire bed deeply after planting. Then leave it alone for a day or two. The roots need to settle, and you need to see how the water moves through the soil before you commit to a routine.
A layout is not permanent. Plants die, seasons change, and you learn what works in your specific yard. The first year is about getting something to grow and figuring out what you actually enjoy tending. The second year is when you start refining. Start small, put the tall things in back, and leave yourself room to walk. The rest you can adjust as you go.


